
Order Your Montclair State University Name Badge
University name badges help faculty and staff represent Montclair consistently at events, meetings, conferences, campus programs and public-facing activities.
Instructions for Ordering your Montclair State Name Badge
-
Step 1 – Locate Website
-
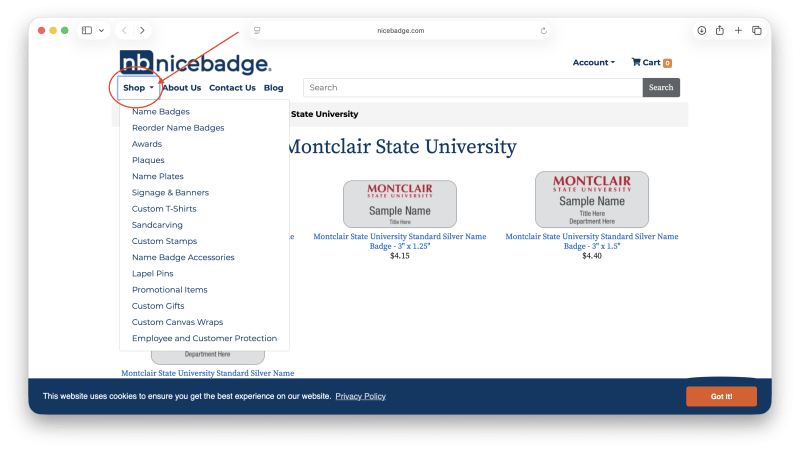
Step 2 – Select "SHOP"
Select the “SHOP” drop-down menu.
-
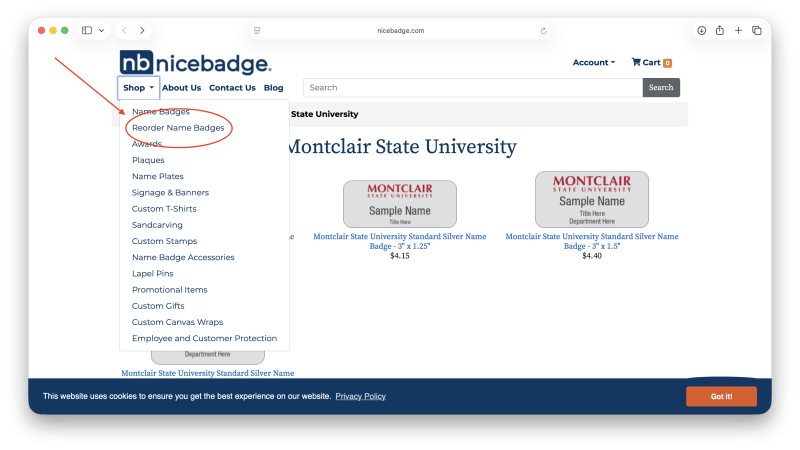
Step 3 – Select “REORDER NAME BADGES”
Choose the selection “REORDER NAME BADGES” (even if this is your first time to the site)
-
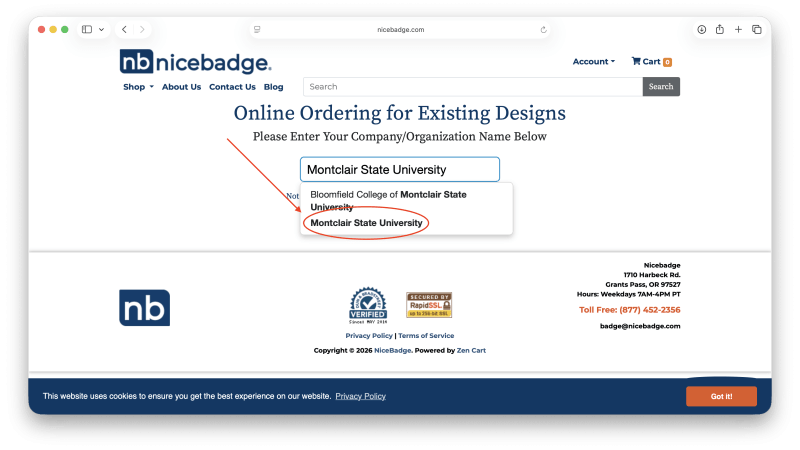
Step 4 – Type “MONTCLAIR STATE UNIVERSITY”
Type in “MONTCLAIR STATE UNIVERSITY” in the middle search bar, and select the dropdown category that appears
-
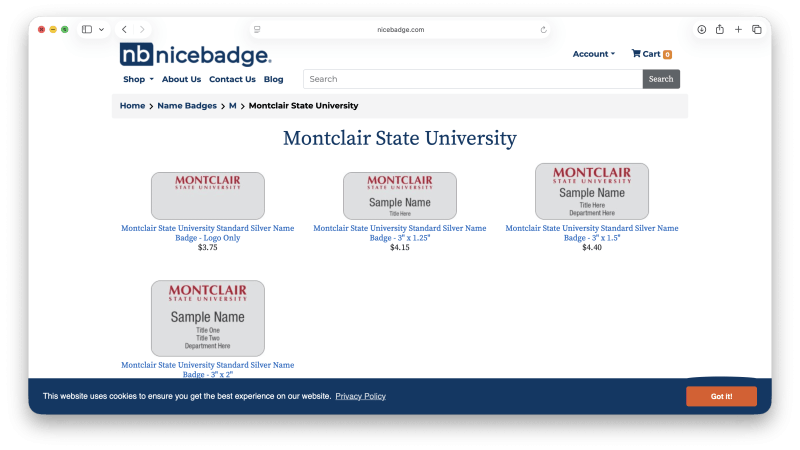
Step 5 – Select your Option
There are 4 badge options. Select the option you need to order based on the size and amount of text lines required:
-
Step 6 – Adjust Text
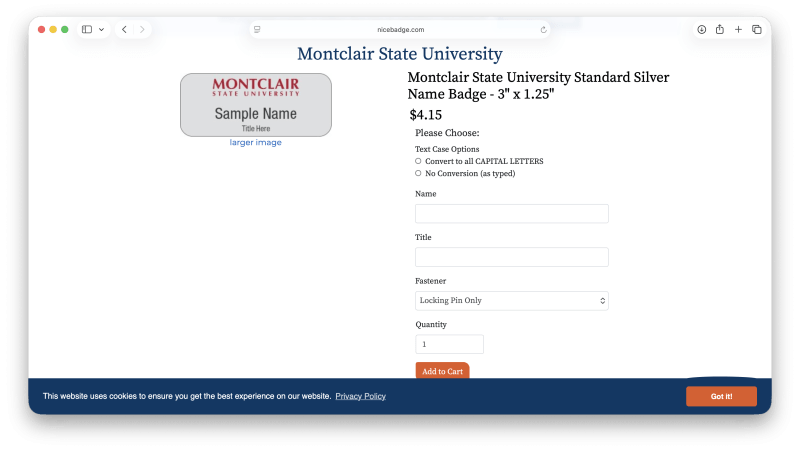
Enter in the name and any additional lines of text needed for title, department, school or college. Choose your text case option and select the fastener needed. Once added to your cart you can enter in as many as needed.
-
Step 7 – Multiple Names
If you have a sheet/list of names there is a quicker way available to add badges to your cart.
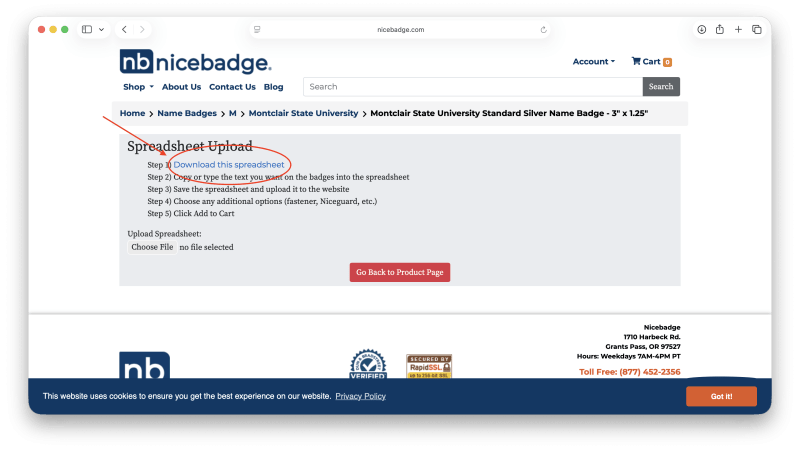
Select the blue “UPLOAD SPREADSHEET” button. It will update with a list of instructions on how to download NiceBadge’s spread sheet. You can copy and paste your information into the supplied spreadsheet.
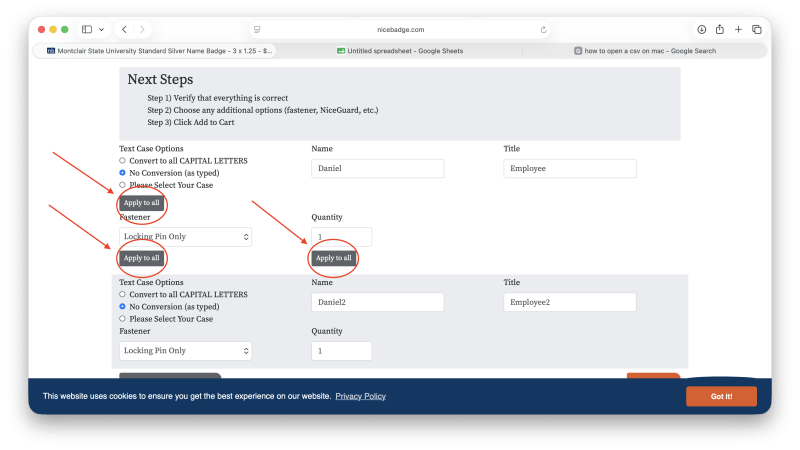
Once the spreadsheet is uploaded you will be given the chance to review the badge options and select your case option, quantity, and fastener options. If needed, you can universally apply details to every badge in your cart (the very first product in your cart is treated as the master badge) by selecting the APPLY TO ALL.
-
Step 8 – Checking Out
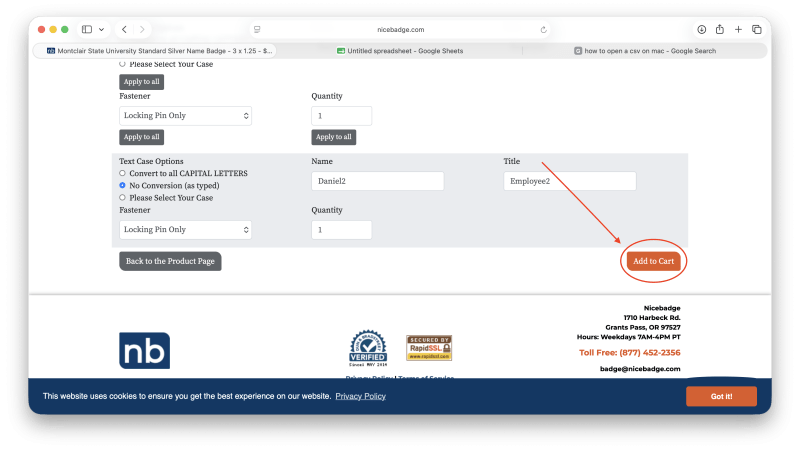
Once added to your cart you can continue with checkout by CLICKING ON THE CART ICON at the top of page.
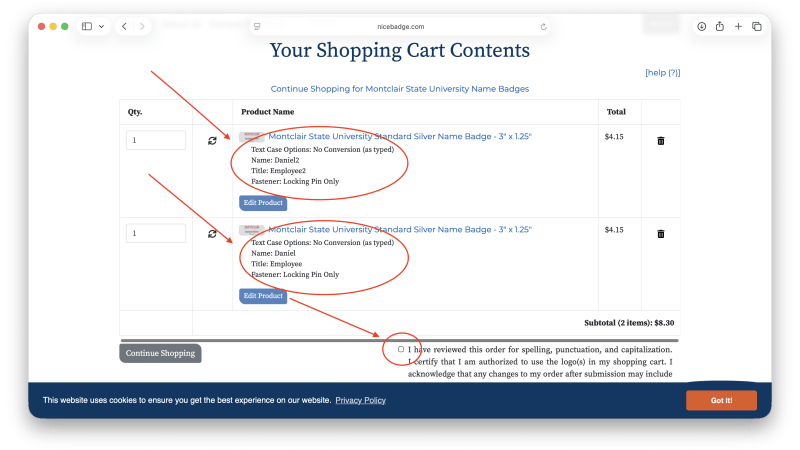
Before proceeding with checkout you will need to REVIEW/PROOF and VERIFY you have looked over spelling and badge options. To proceed, CHECK THE BOX at the bottom right-hand corner and select the orange “CHECKOUT” button.
-
Step 9 – Check Out
Checkout:
Step 1: Delivery Information: Check the shipping address. Add any order notes if needed. Select the shipping option.
(Ground/Expedited)
Step 2: USE YOUR DEPARTMENT’S P-CARD. Enter card information. Check the billing address.
**See next page for important information about asking for a “proof” of your cards**
Step 3: Order Confirmation: You will see the badge details again. Check the information entered one last time before submitting your order. Please use the SPECIAL INSTRUCTIONS BOX on the shopping cart page if necessary.
Once you select the blue “CONFIRM ORDER” button you will receive an ORDER NUMBER.
You will RECEIVE A CONFIRMATION EMAIL that your order has been placed.
For Customer Service, please call 541-476-3166, ext.1
-
Step 10 – Important Steps
IMPORTANT INFORMATION ABOUT ASKING FOR A “PROOF” OF YOUR CARDS
SPECIAL INSTRUCTIONS BOX / PLEASE NOTE:
The more text that is entered can end up being more condensed to fit into the space allotted and cause the type to look “squished”. If you have more than 55 characters in your name, title or department’s name, please ask for a “proof” in the Special Instructions or Order Comments box (it will be emailed to you) to confirm that your business card type is legible (not squished) before proceeding with production. Once you receive the proof, either approve or reject (if you reject, please call Randi Rosh)