
Image and Video Formats
Images and videos are a critical component of our University’s online identity. When building out pages for the Inside Montclair website, be mindful of where and how you use imagery to enhance your pages and to illustrate your messages.
Image and Video Selection and Sourcing
The University’s brand leans heavily into photography for visual impact. By and large we do not use illustrations. On the web we also try to avoid images with overlaid text or infographics because they do not scale well to mobile devices.
Any photos you use on the University website and social media must be owned by the University or be used in accordance with applicable copyright laws. Your first stop for sourcing photos should always be University Communications and Marketing’s photo collection on SmugMug. Photos provided by UCM through our online library are owned by the University, have been retouched and edited to fix small problems and have been approved for use by members of the University community.
When using photos supplied by students or staff, be sure to document the fact that you’ve been given permission to use the photos by their owners and that the original photos are high enough quality for use on the website. Also, you must re-save the images for use on the web to strip away any metadata stored by the photographer’s phone and to ensure maximum compatibility.
If you need a photo of something not at the University, reach out to Creative Director Randi Rosh to explore stock photography options.
If you need photography or video of something specific that does not exist in our photo collection, reach out to Creative Director Randi Rosh to discuss scheduling a photo or video shoot.
Saving Images for the Web
Before you use an image on the web, you must resize and re-compress the image to reduce its file size, remove personal metadata and conform the output file for maximum compatibility.
Images should be saved in JPEG format for best compression. While PNG images offer maximum clarity, they do so by saving files anywhere between 5 and 10 times the size of JPEG files. More to the point, images you upload into Drupal will be re-saved as JPEG when output on the page anyway, so all that space is effectively wasted.
GIF and SVG formats are not supported on our website.
Please use the following guides for saving JPEG images for our website. We do not recommend installing Adobe Creative Cloud just to resize and save JPEG images for the website as each Creative Cloud license costs the University a significant amount of money. GIMP is a full-featured free and open source photo editor that you can download onto your University-issued computer, and Adobe Express is a browser-based photo editor that all University employees and students have access to at no additional cost.
Saving Images using GIMP
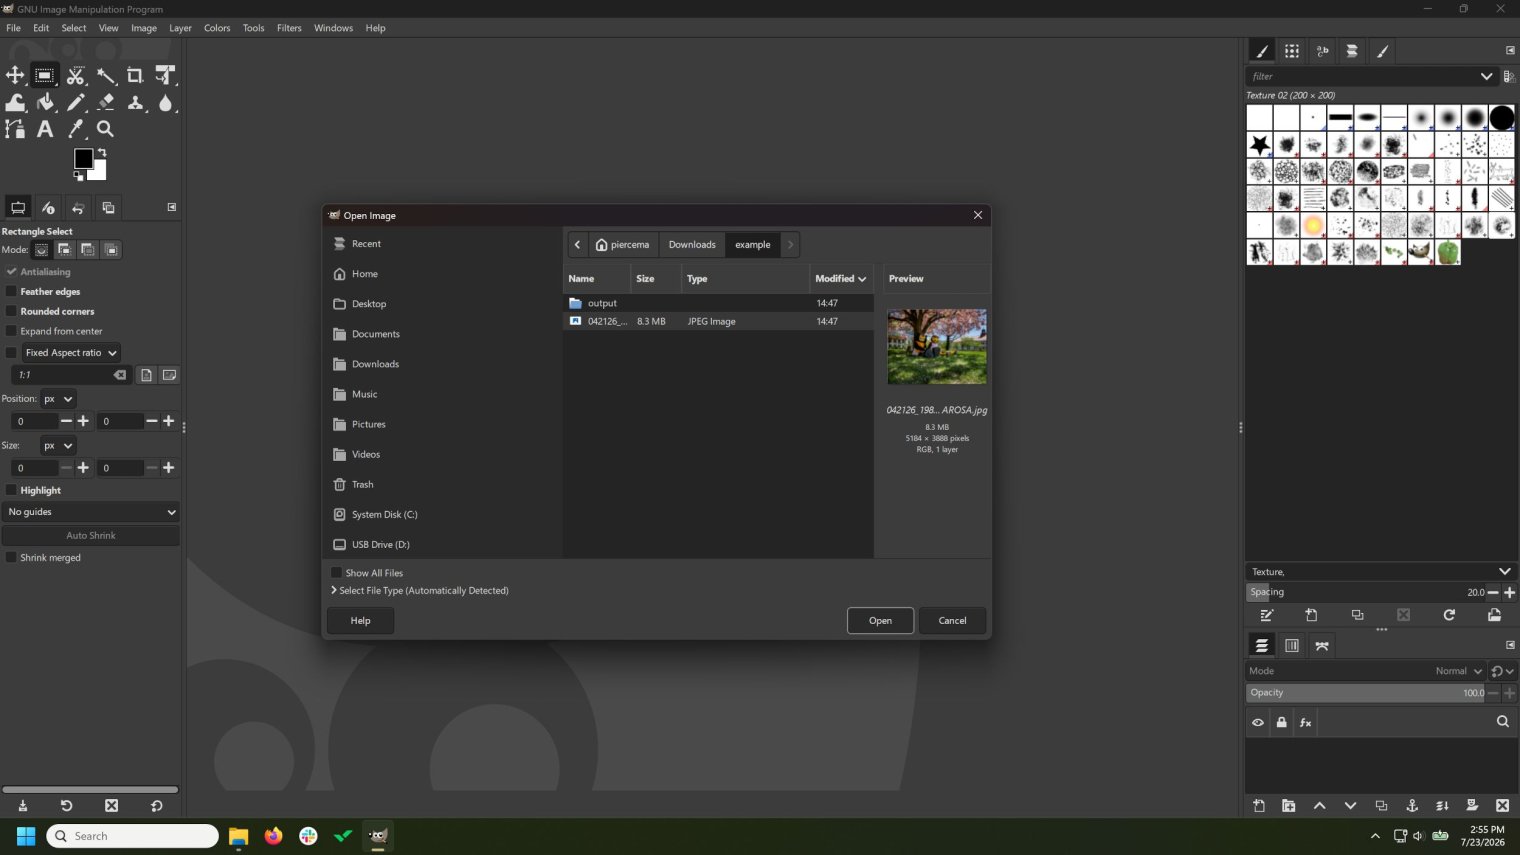
1: Open the image by dragging the image onto the GIMP window or by choosing File -> Open.
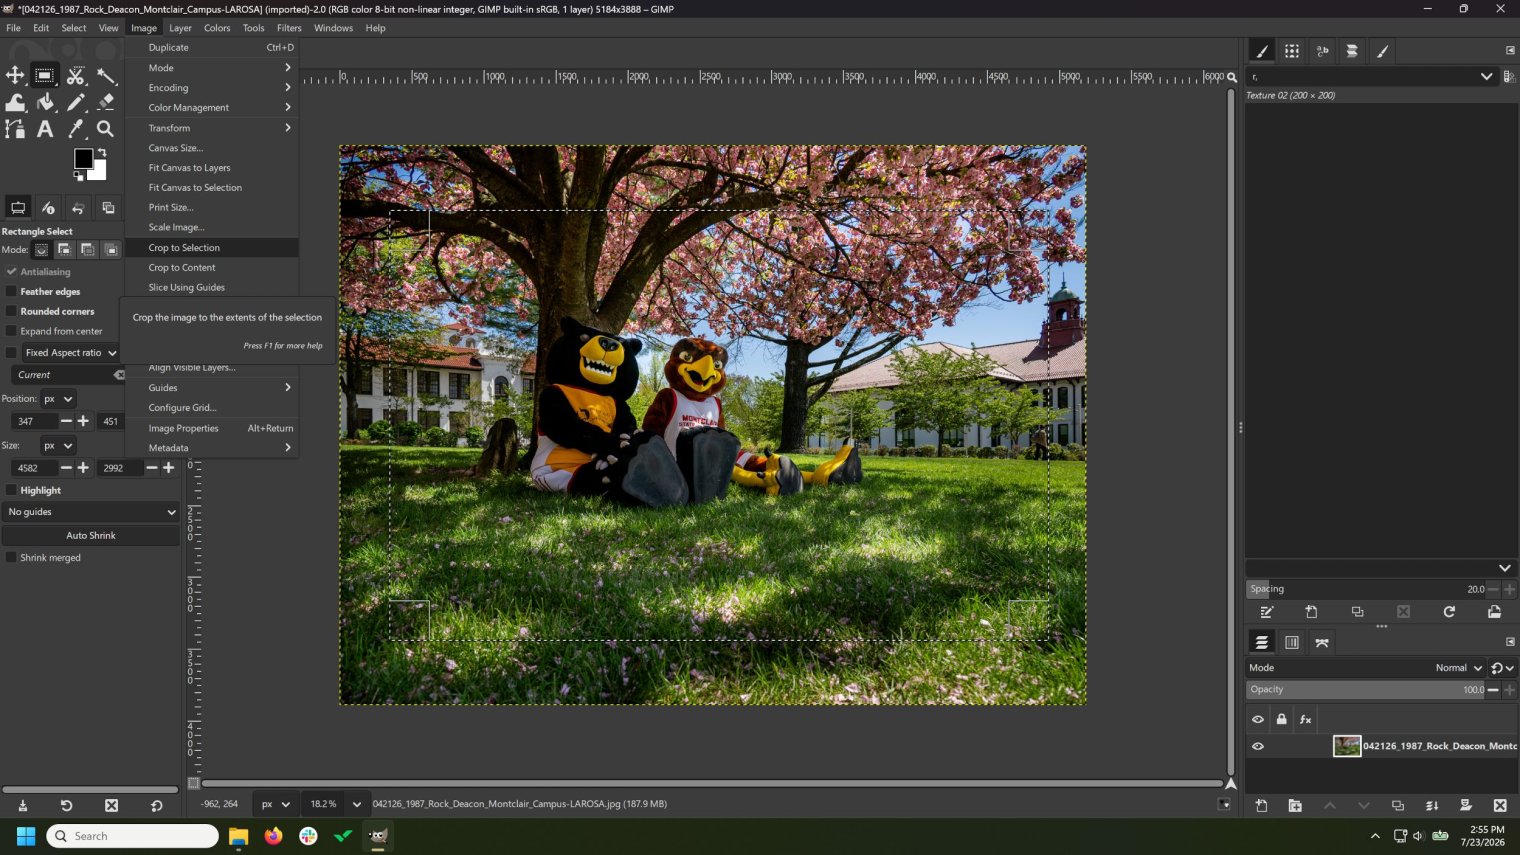
2: If you need to crop the image, use the Rectangle tool (press the “R” key) to create a rectangle around the part of the image you want to keep, then select Image -> Crop to Selection.
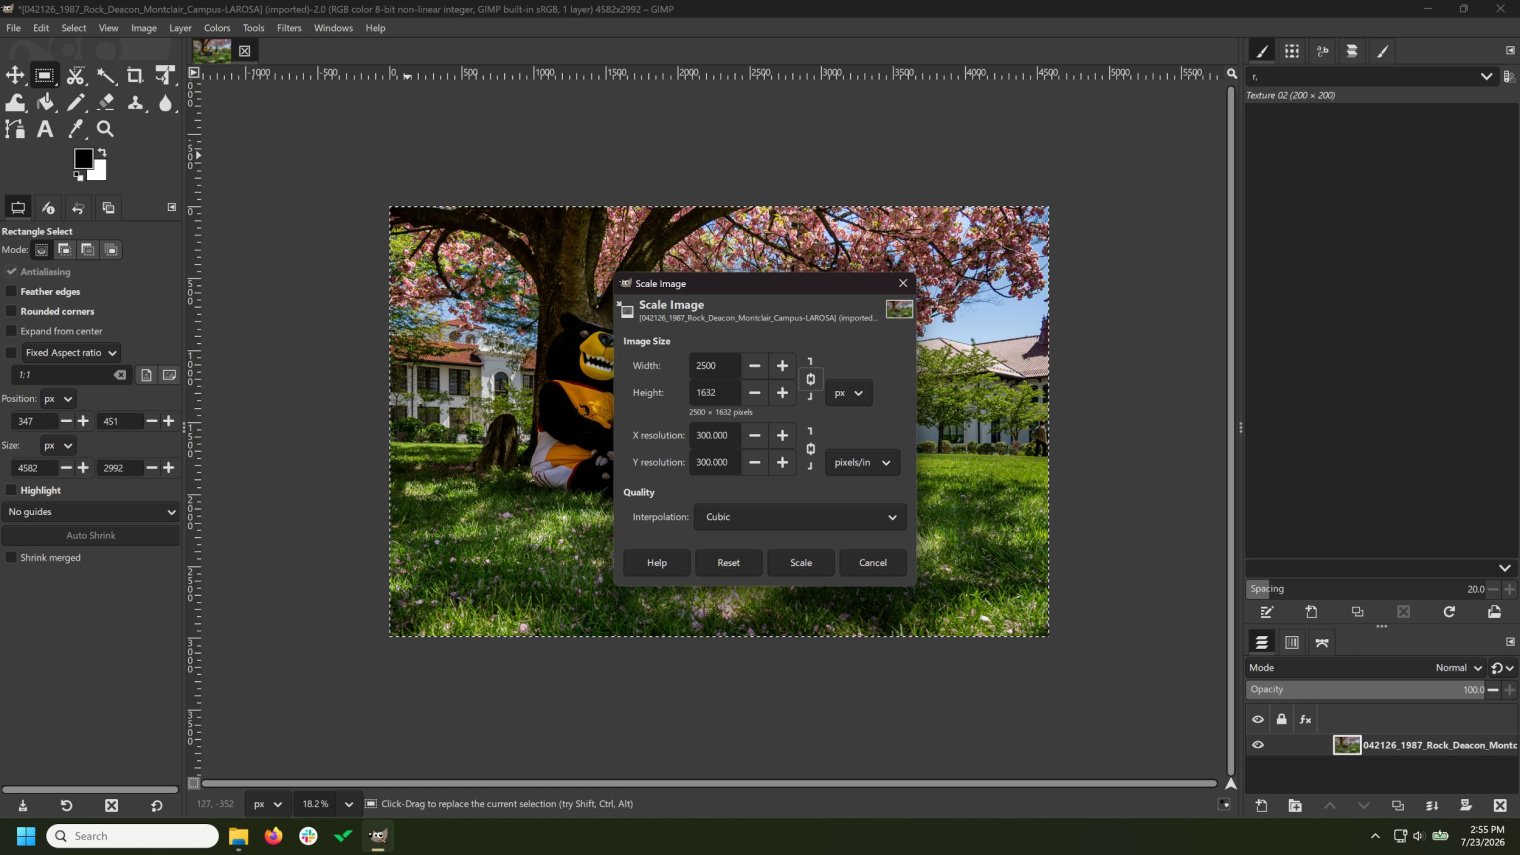
3: Select Image -> Scale Image to resize your image so that it is at most 2,500 pixels in either dimension.
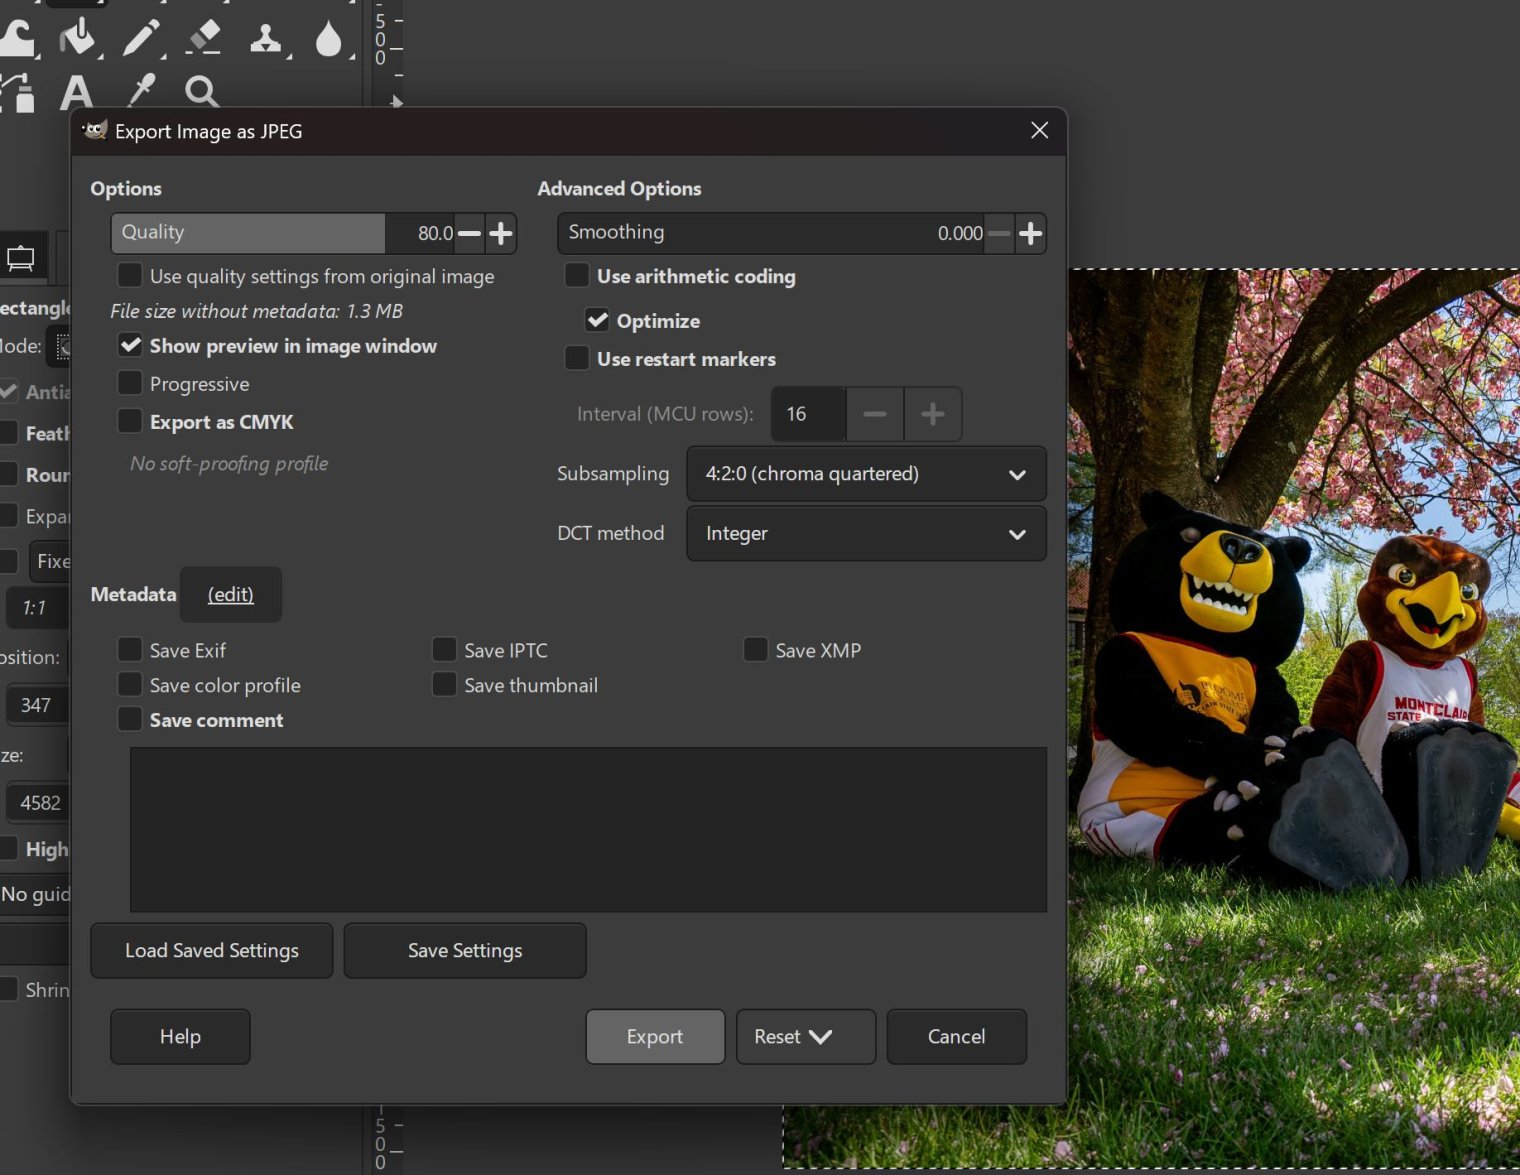
4: Select File -> Export and give the image a file name ending in “.jpg” and click the “Export” button. When the export dialog box appears, set the image to 80% quality and 4:2:0 subsampling and then hit the “Export” button.
Saving Images using Adobe Express
1: Log in at adobeexpress.com using your Montclair e-mail address and password.
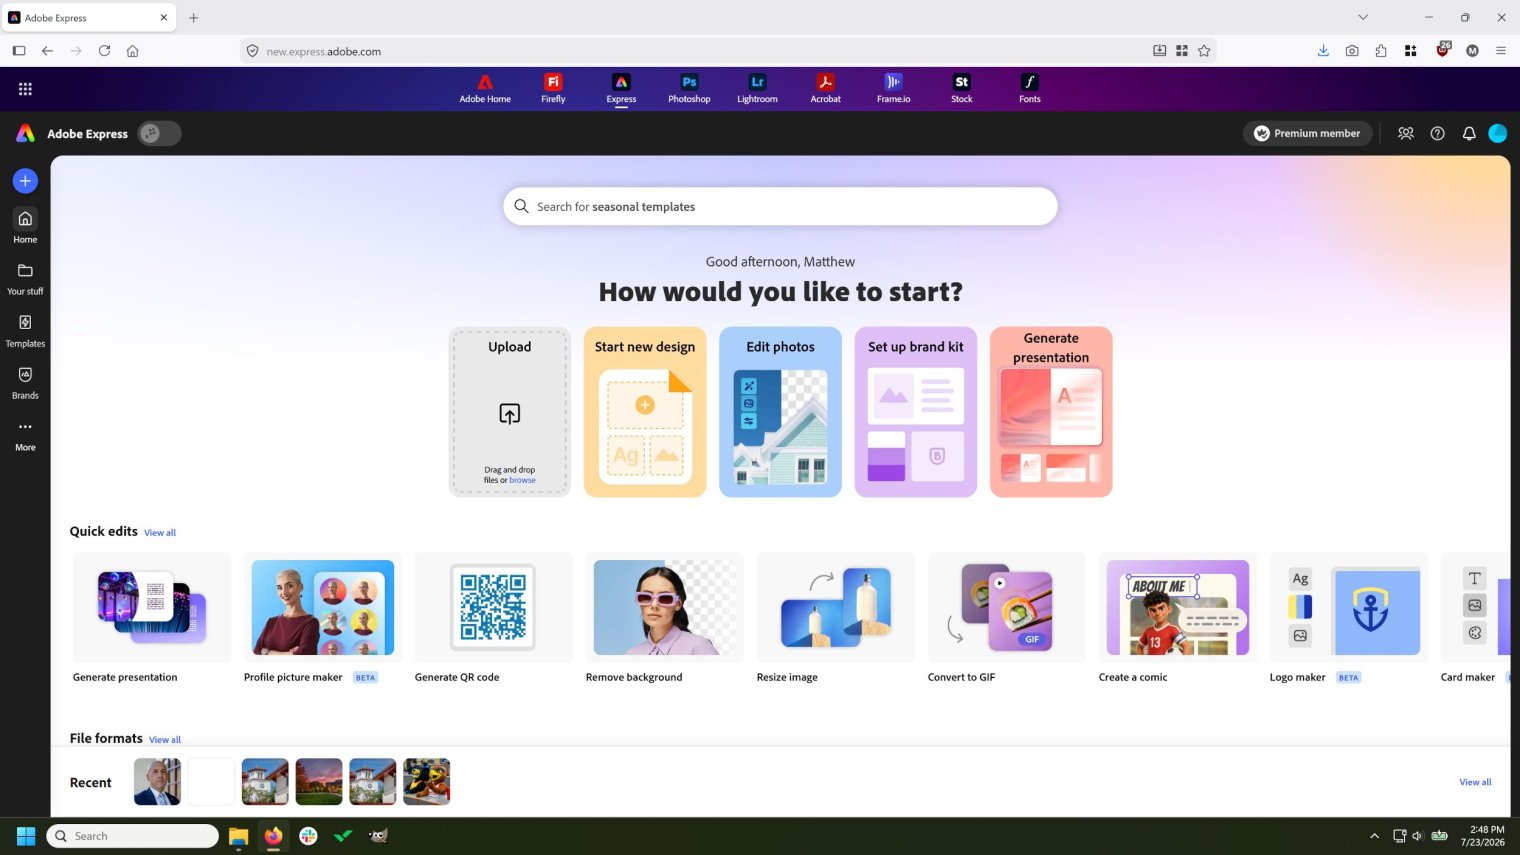
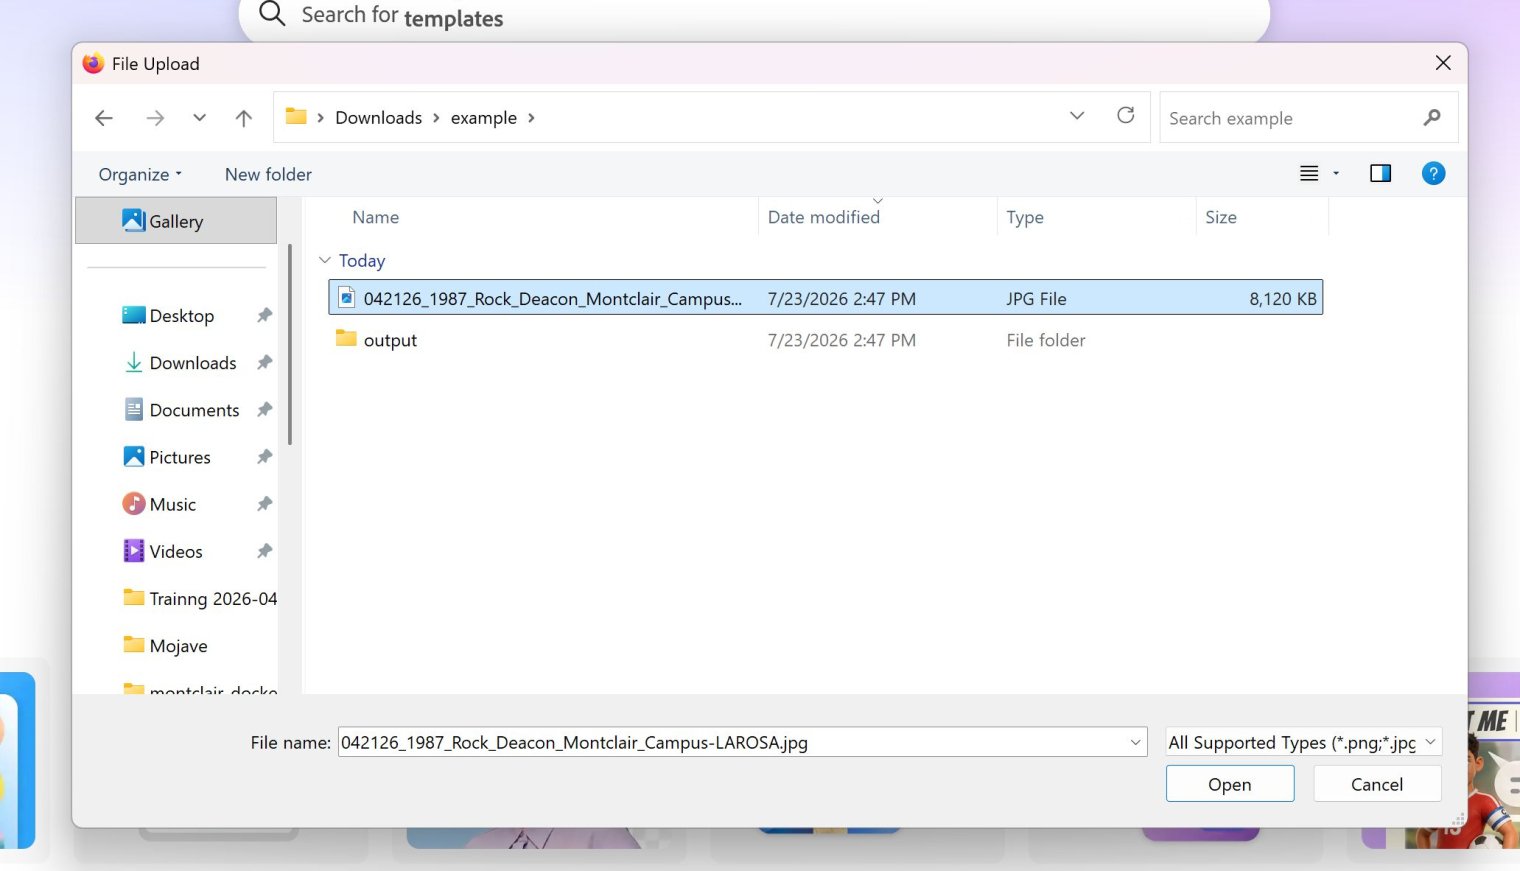
2: From the home screen, click on “Upload” and select your full-sized image.
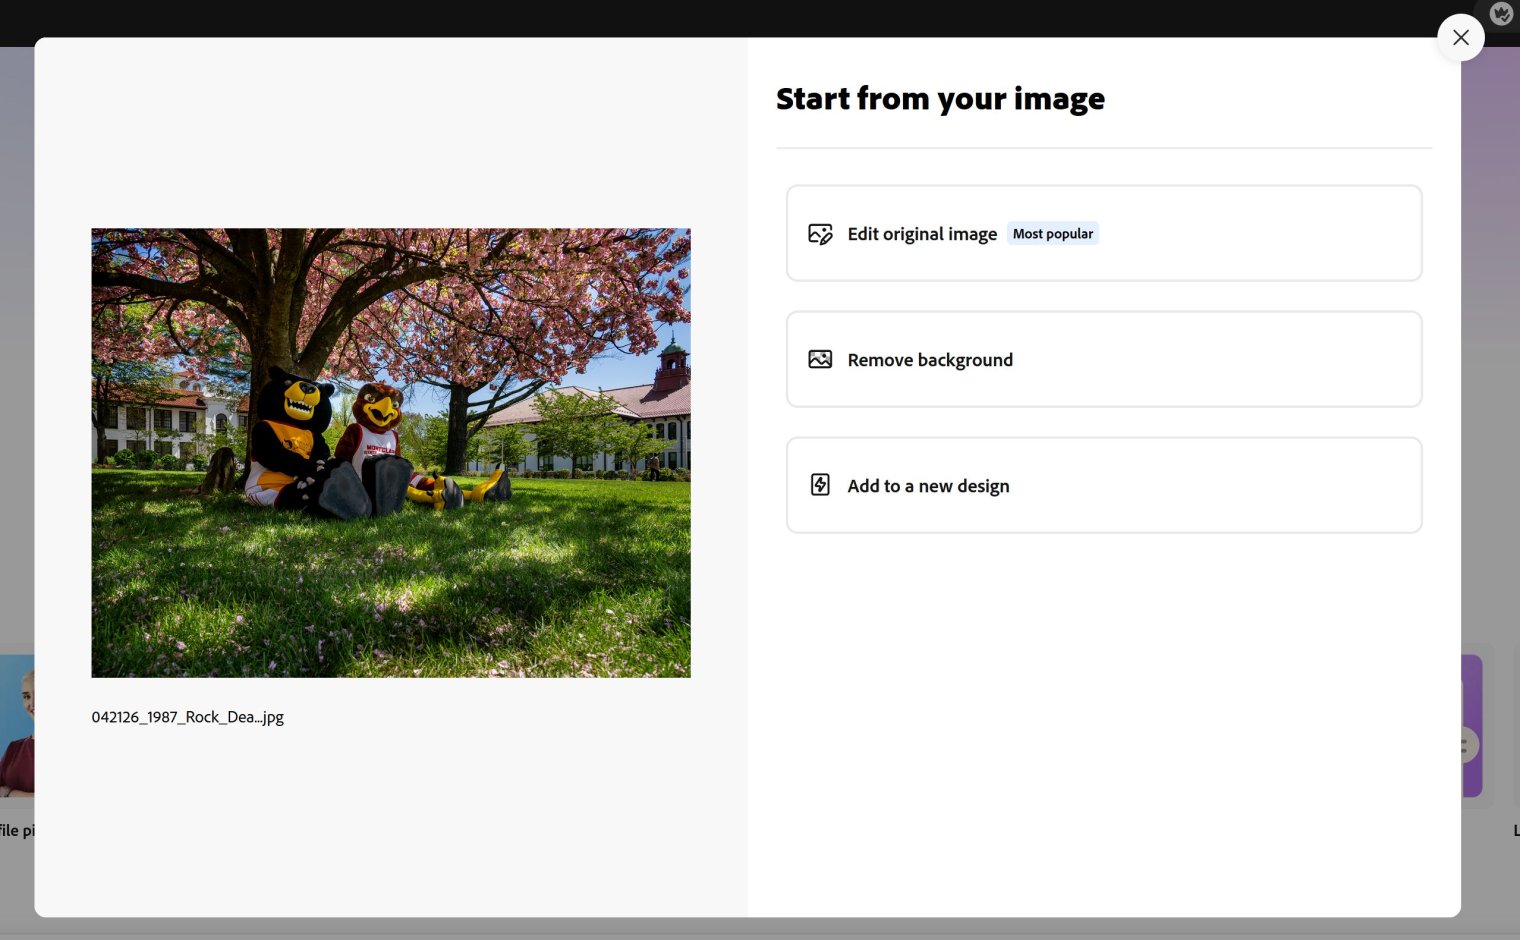
3: Select “Edit original image.”
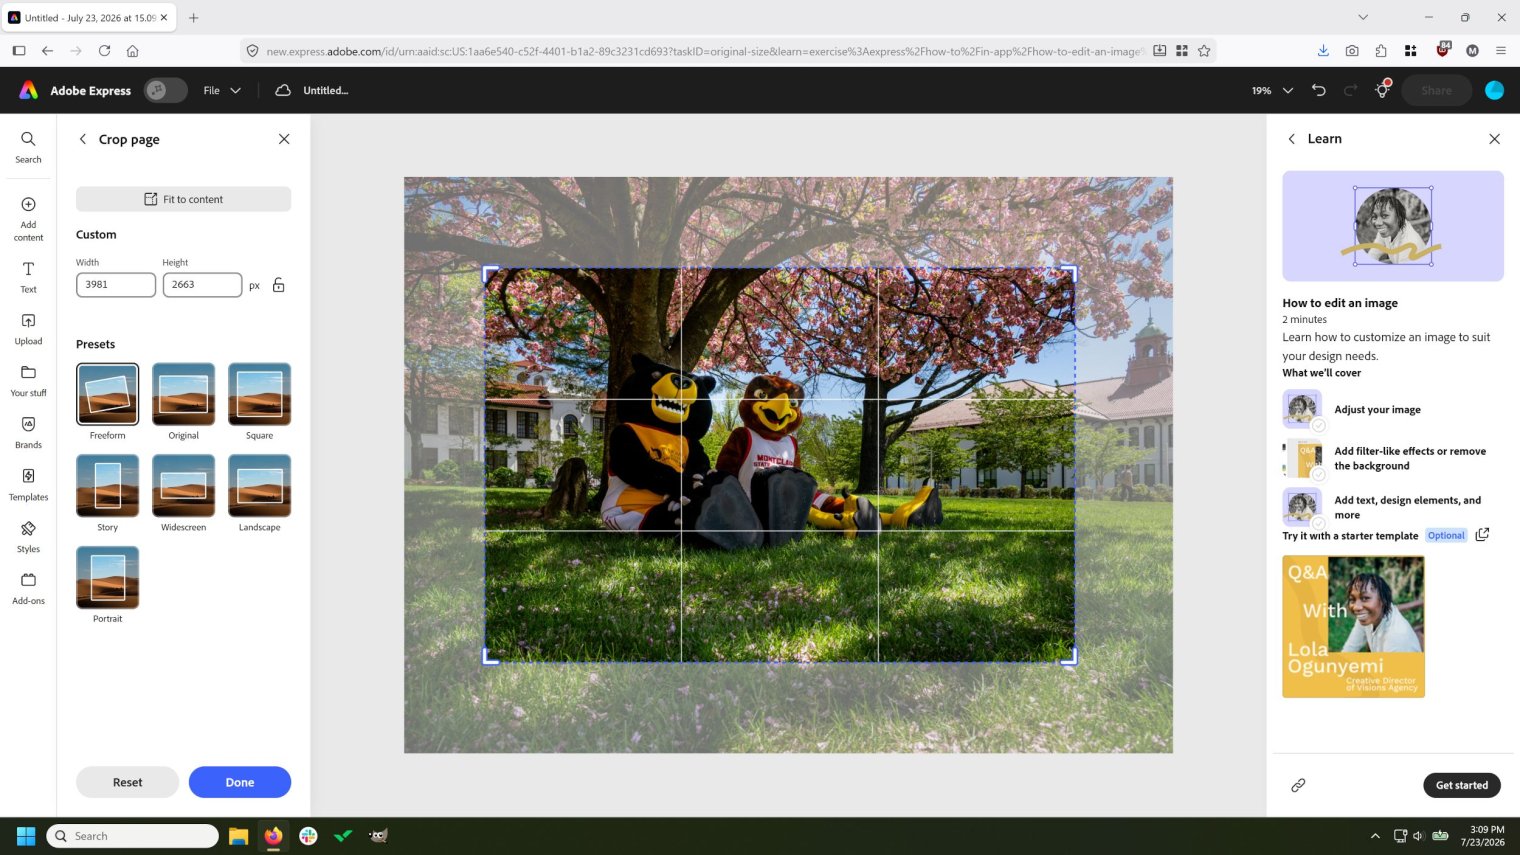
4: If you need to crop the image,click on the gray area around the image, then from the left-hand panel, select “Crop Page.” Move the edges of the rectangle so that they re-frame the photo as desired, then click “Done.”
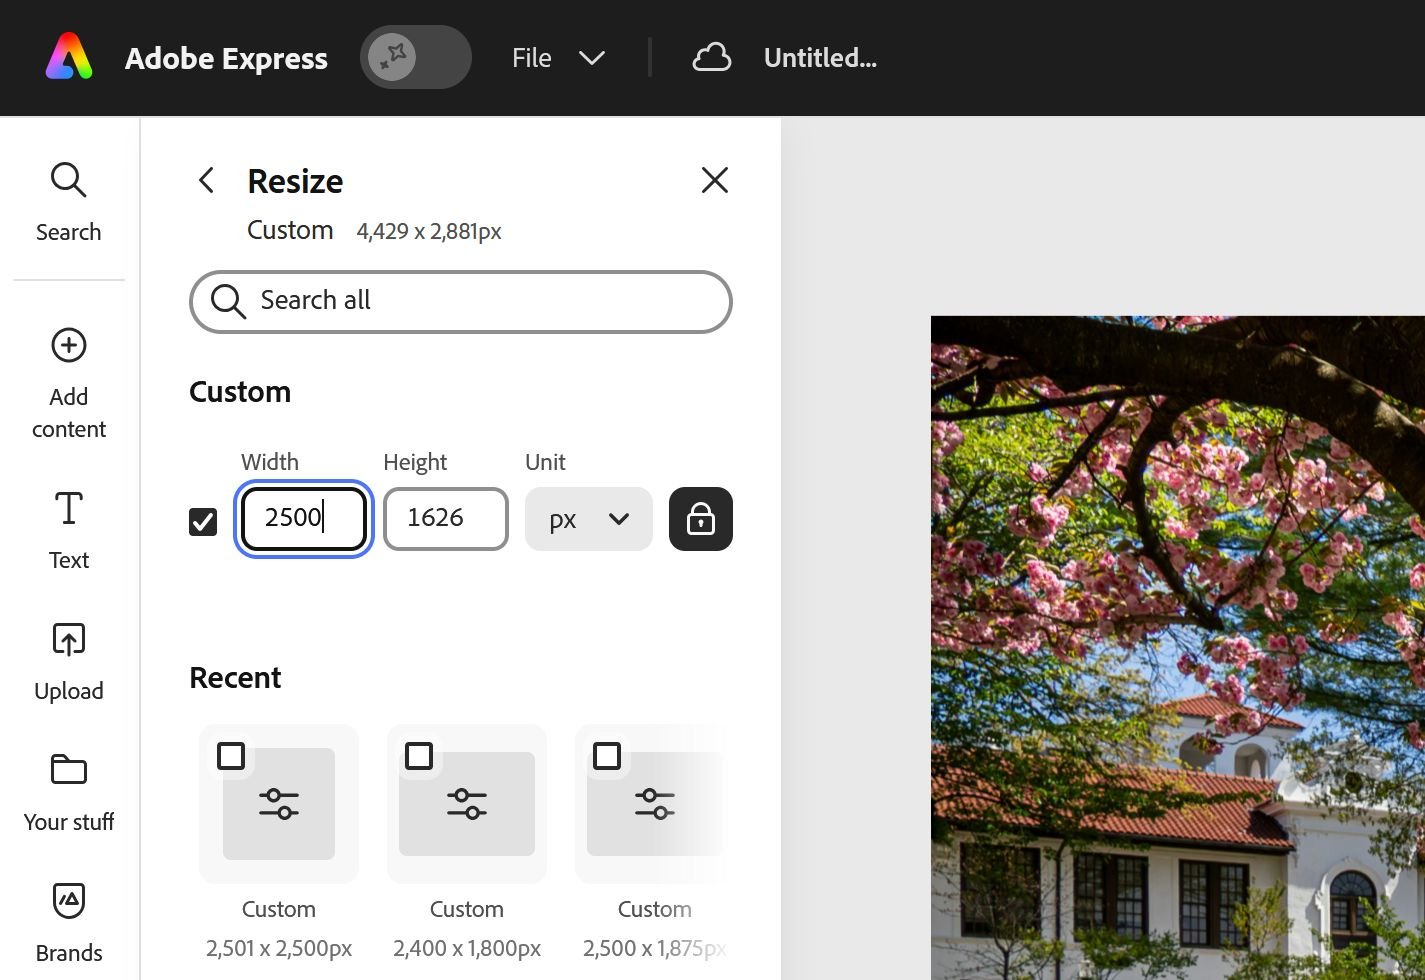
5: From the “File” menu choose “Resize.” Under “Custom size” start by clicking the lock icon to ensure that the image does not get stretched, then replace the larger of the two numbers with 2500. (If the image is already smaller than 2500 pixels then you can skip this step.)
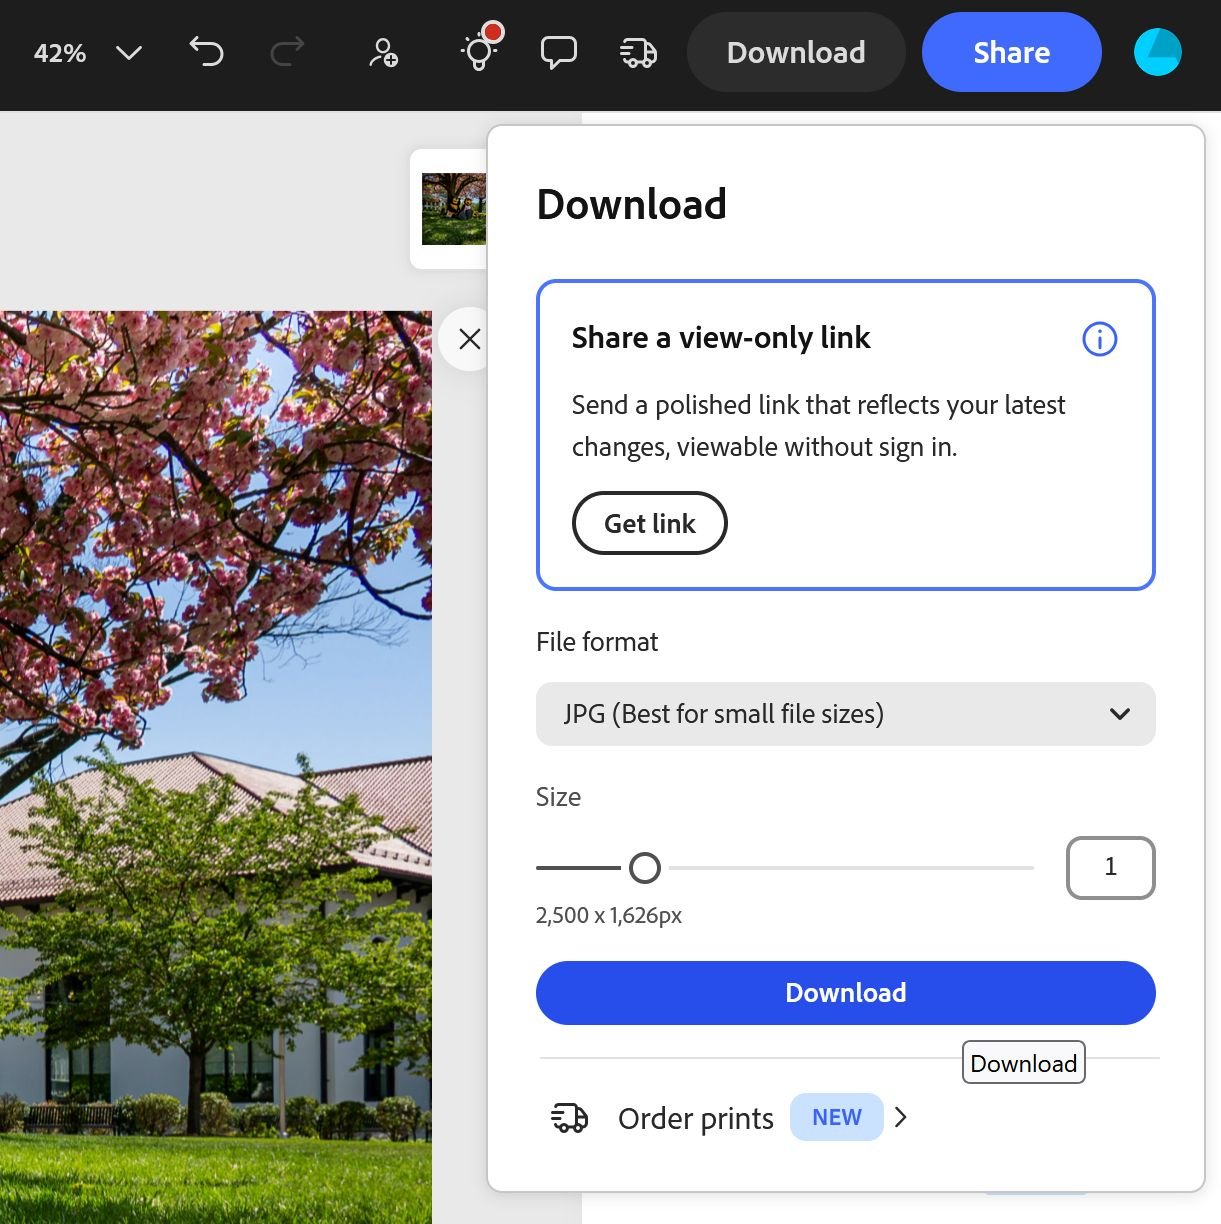
6: Click on the “Download” button and select “JPEG” as your file format. Select a location and a file name. (Note: Adobe Express does not have any advanced options for format or quality.)
Saving Images using Adobe Creative Cloud
1: Open your full sized image in Photoshop CC.
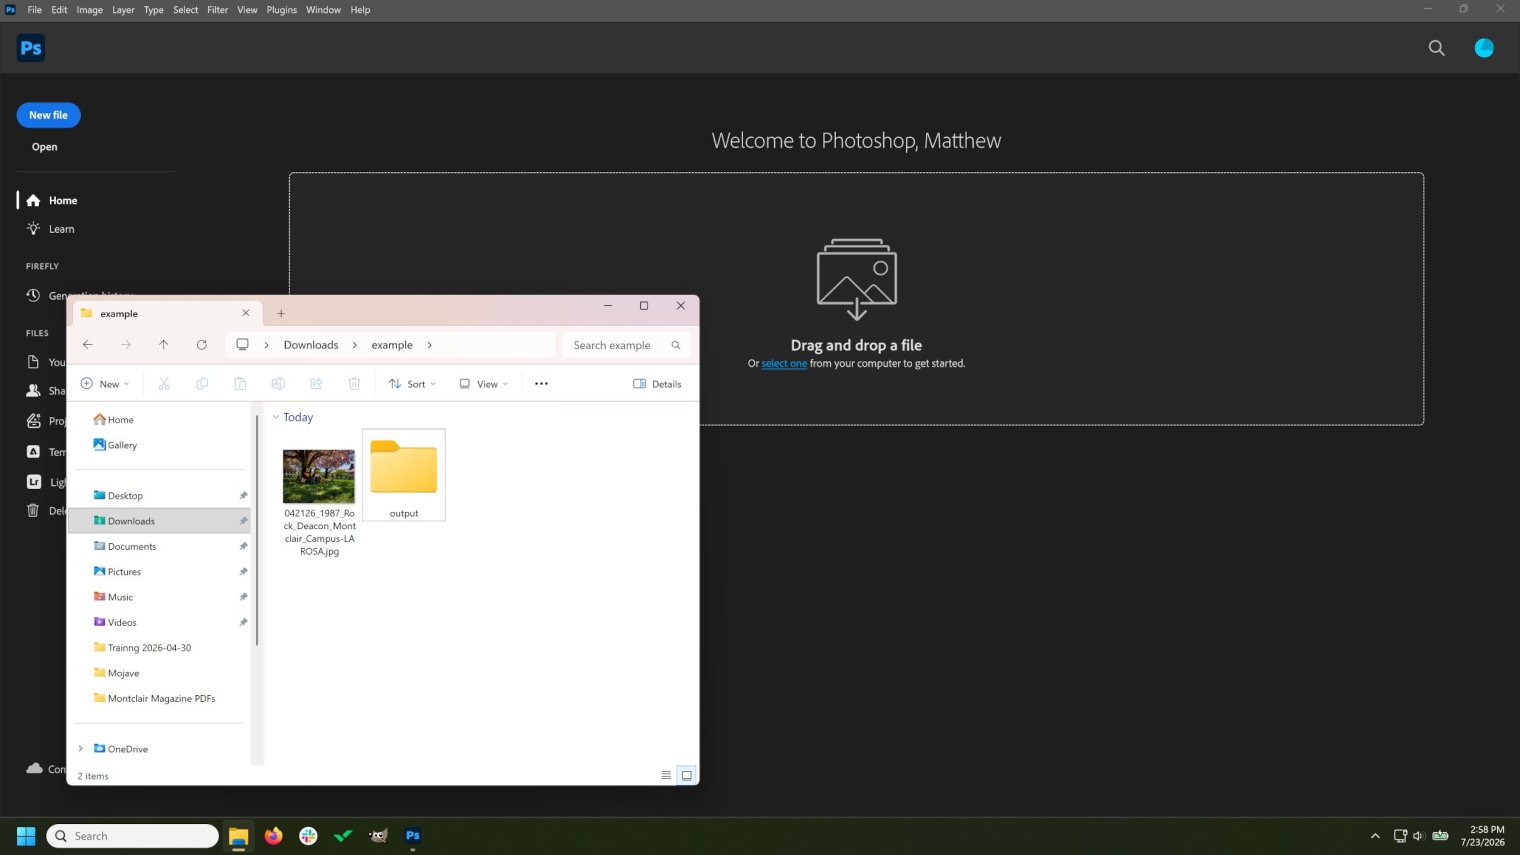
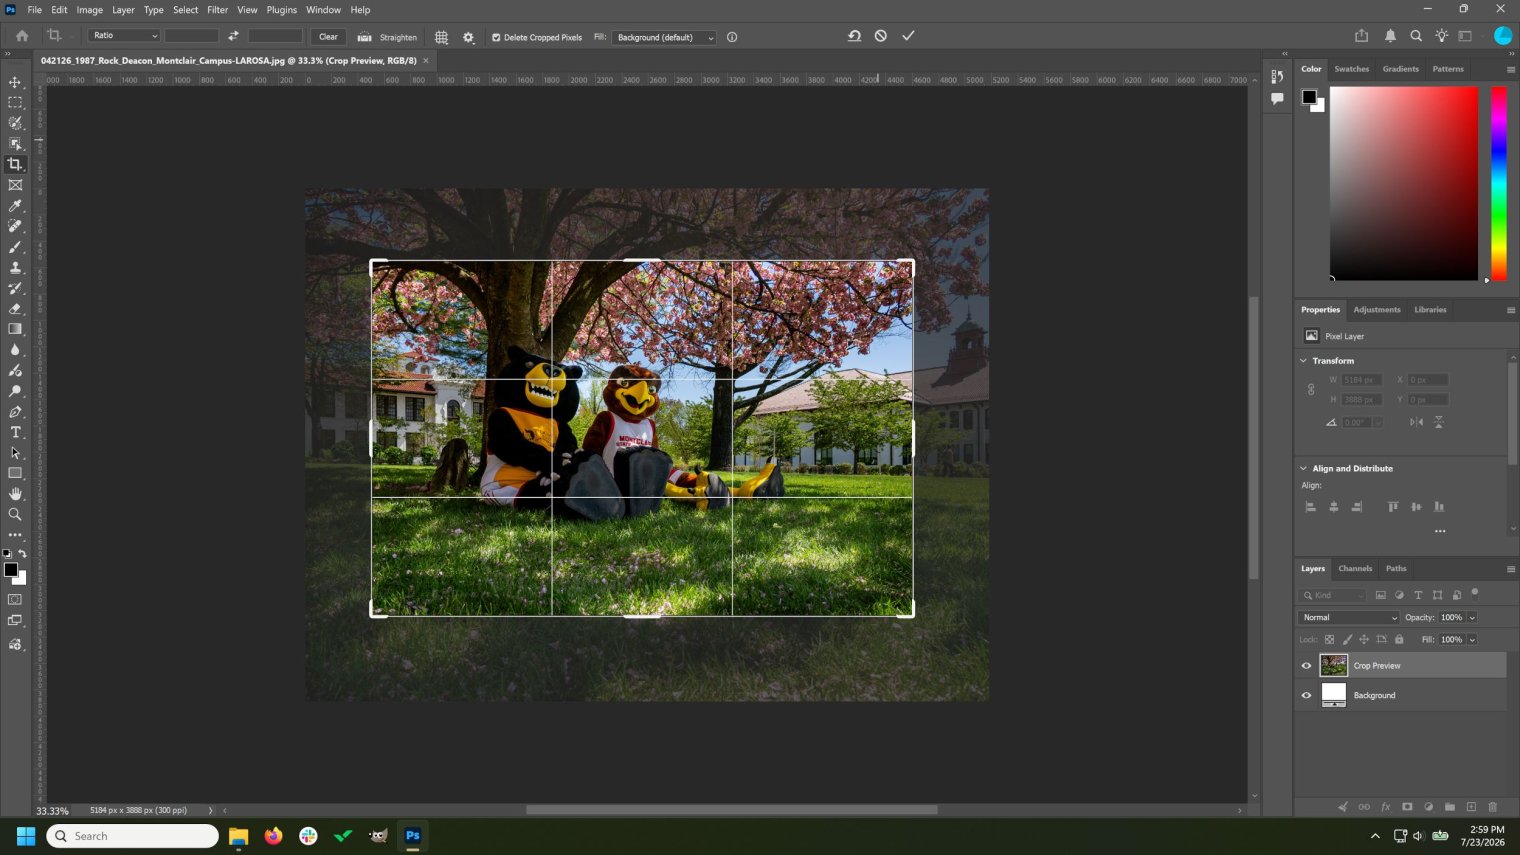
2: If you need to crop the image, click on the cropping tool (or hit the "C" key on your keyboard), then draw a rectangle on your image. Adjust the rectangle to frame the image as desired, then hit Enter or click the check mark icon in the tool bar menu at the top of the window.
3: Open the Image menu and select Image Size. Next, set the image width or height in the Image Size dialog box.
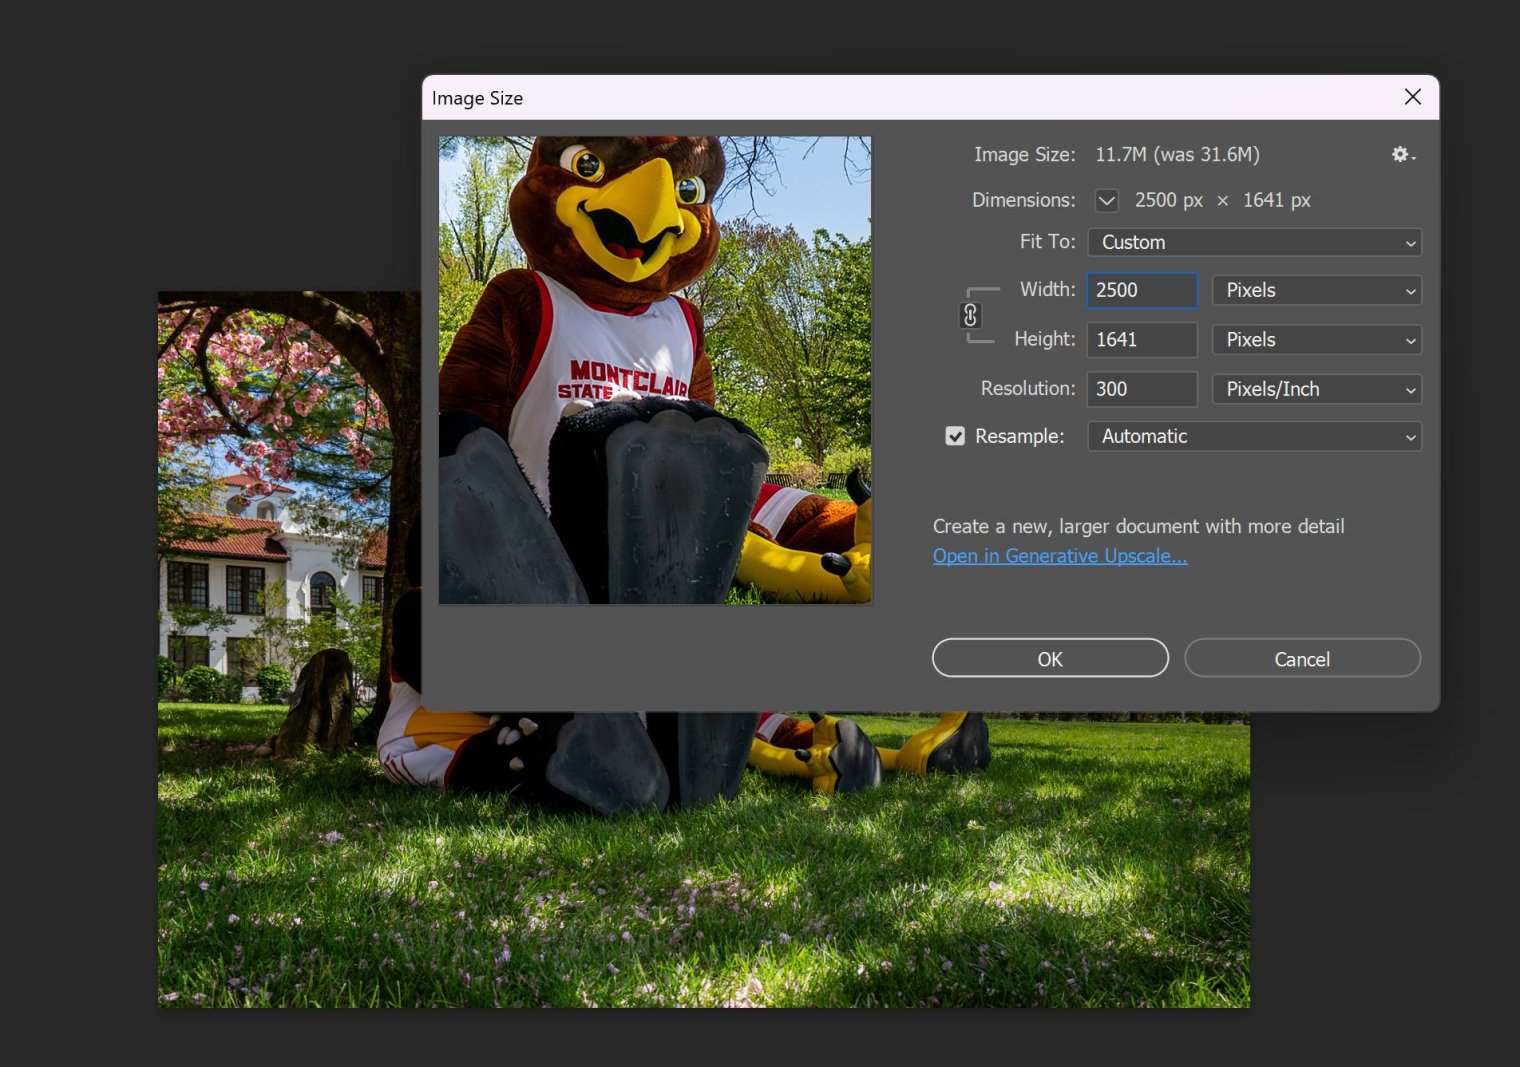
4: When you want to save your image for the web in Photoshop CC, select the File menu and then Export then Save for Web (Legacy).
5: First select JPEG as your file type (the unlabeled drop-down menu underneath “Preset”). Make sure that Optimized and Convert to sRGB are checked, and set Quality to 70.
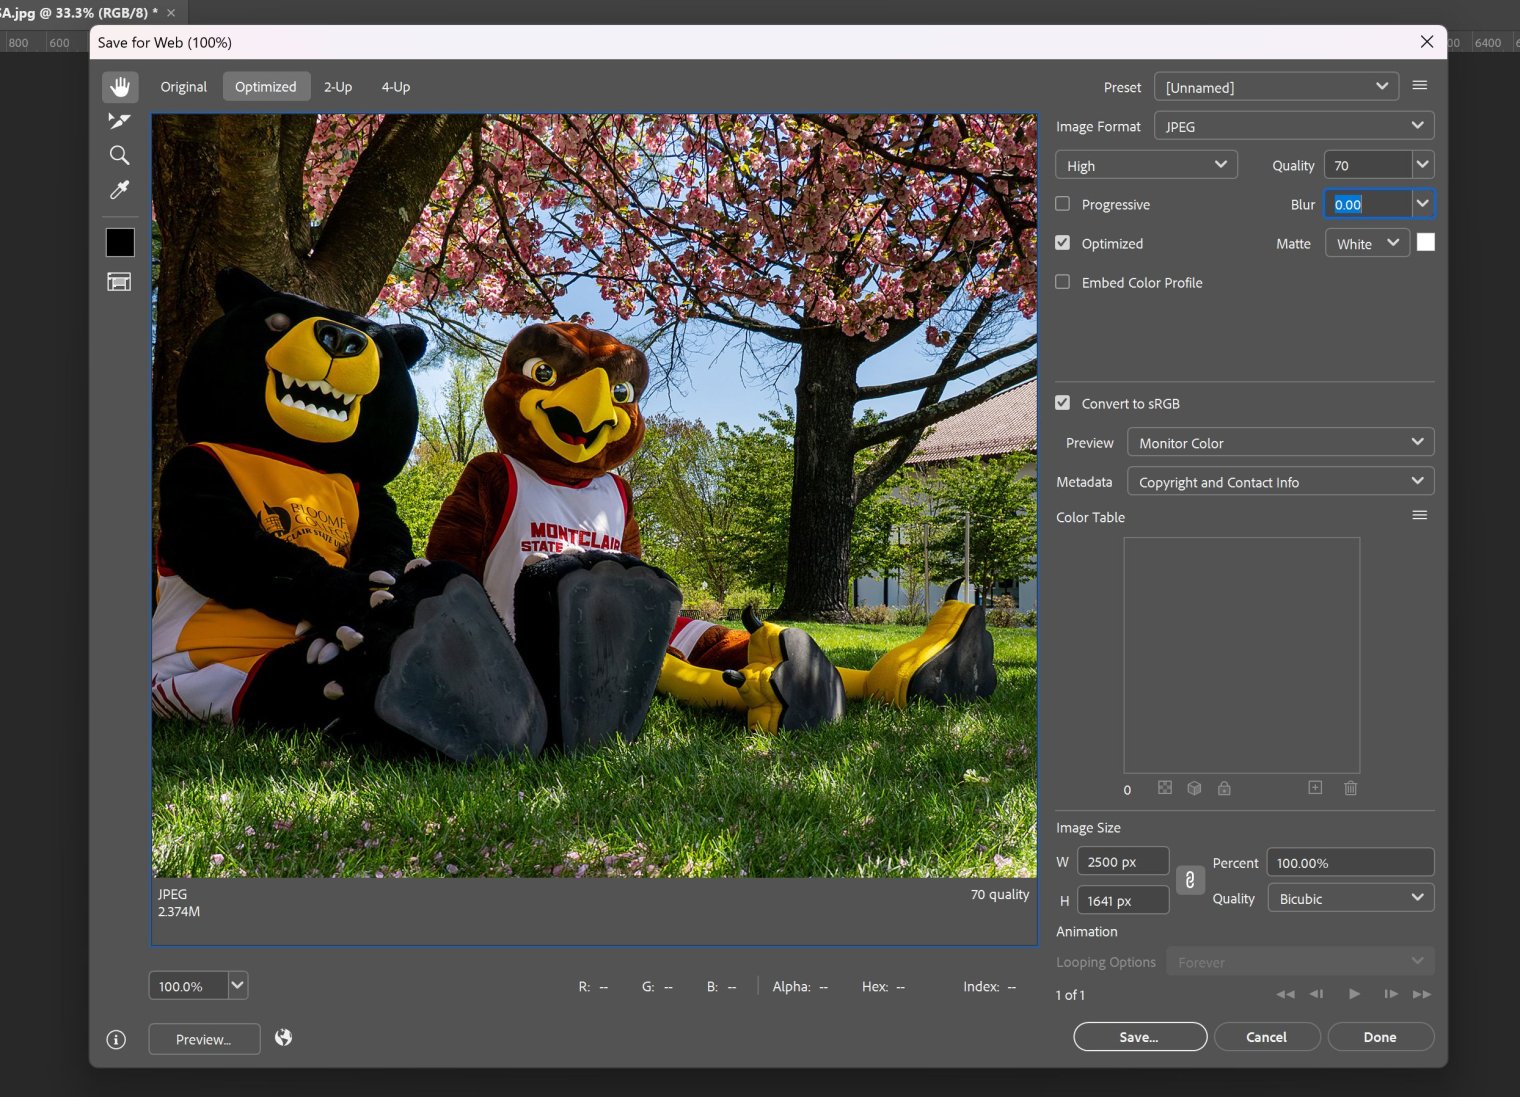
6: Finally, click “Save …” to select a file name and save the image.
Using Videos on the Web
Videos used on the web should be uploaded to YouTube because it off-loads the hosting requirements to an external service, and because YouTube offers extensive tools for closed captioning. As such you don’t need to be as mindful of file format when uploading to YouTube since YouTube will automatically recompress the video, but you should ensure that your video is at least 1920x1080 pixels and you should choose either 30 fps or 60 fps.
Video Accessibility
In order to ensure that our videos are accessible for visitors with hearing disabilities, videos must include closed captions. Closed captions must:
- Include the speaker’s words verbatim. You should even include filler words, like “um” and “uh.”
- Indicate the person speaking if the person is not on screen. When there are multiple speakers in a video and the speakers are off-screen, indicate which person is speaking whenever the speaker changes (not for every line of dialogue).
- Indicate other sounds. While this is at your own discretion, any important sound (i.e. sound that is not raw noise) should be indicated in captions with brackets (e.g. [door slams] [engine starts]). If your video starts with some music before any dialogue, you should indicate that with [music playing] so that hearing-impaired viewers know that their captions are displaying properly.
- Be synchronized with the video. Providing a transcript may be helpful to people who don’t enjoy watching content in video format, but it is not enough to meet accessibility requirements. Captions must display in time with the video.
Providing Captions
When you provide a video to University Communications to post on the University’s main YouTube channel you can provide captions in one of three ways.
- Provide a transcript. YouTube will attempt to synchronize the transcript to the video through voice recognition. University Communications will check the synchronization and ensure that non-speech sounds are also represented.
- Provide a subtitle file. YouTube supports several subtitle file formats.
- Arrange for professional captioning. Professional captioning usually takes at minimum two full business days, so plan accordingly.