
Assignment Templates
Clarity and consistency in assignments help students do the work more efficiently and effectively. To ensure you provide the relevant assignment information please see the OFE assignment template below:
Assignment Template
Assignment Title
[Title the assignment to indicate task and/or specific relevance to course (e.g., “Reflection Paper #1”)]
Overview / Purpose
[Clearly state the learning objectives of the assignment. What is the purpose and rationale of the task? That is, what will students gain from completing the work in this assignment? Consider both the knowledge and the skills to be acquired, and their relevance on multiple levels – to the class, discipline, university/institution, future careers, etc., and indicate each in the purpose section.]
Task(s)
[Describe in detail the steps required to complete the assignment, including the sequence of tasks and what materials should be used (and may not be used). For larger-scale assignments, this section should be scaffolded into multiple tasks with separate due dates and opportunities for feedback. If appropriate, provide time in the sequence for brainstorming, conceptualizing, drafting, receiving feedback, and making revisions. Consider the rungs of Bloom’s Taxonomy to move from lower-level to higher-level thinking in the assignment. Be careful not to make leaps in cognitive steps; sequence them to avoid confusion.]
Materials
[If not already indicated within the above sections, clearly state which materials students must and must not use in their completion of the assignment. State where such materials may be found (e.g., on reserve at the library). If you require particular kinds of materials, how many must be used and cited?]
Instructor Expectations / Grading Criteria
[Detail what a successful finished product looks like. Avoid “jargon”; describe for example what a response paper or a keystone project is either here or from the outset of the assignment description. Set clear parameters for what constitutes “excellent” versus “unsatisfactory” work. Include in this section multiple samples for students to assess and use as models. Include a clearly-defined grading rubric, if applicable, or a checklist for students to follow. If not included elsewhere, include here the grading scheme of the assignment: is it graded as complete/incomplete, with a letter grade, a percentage, or point grade?]
Requirements
[State the scope required (e.g. how many words or pages; how much time; how many sources, etc.) Allow for multiple means of expression to support different learners. Clearly state how sources are to be cited (e.g., MLA, APA style). Consider including a statement regarding the extent to which AI may be used in the assignment.]
Submission and Due Date
[Indicate what format submissions must take and how they are to be turned in. For example, are PDF documents or Google docs expected? If a video is submitted, what formats are allowed? Are hard copies required or are assignments to be submitted on Canvas.
Due dates may also be incorporated in the task section if the assignment is “chunked” into multiple parts.]
How to create a Google Sites Template
Instructor Guide: How to create a GSites Template
- Sign into your Google Drive account.
- To create a folder, click +New then choose New Folder.
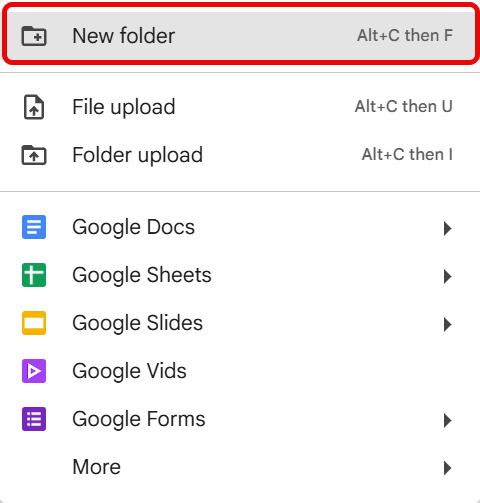
- Enter a name for the folder (ex. Site Template) then click Create.
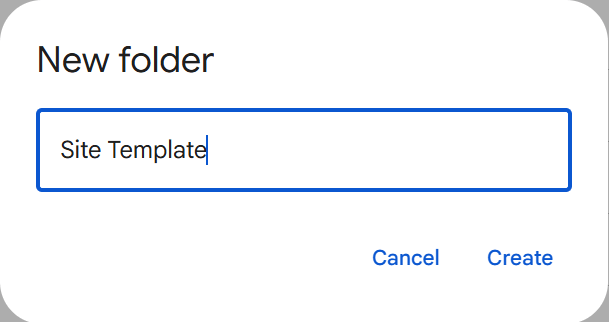
- Select the folder then click Share.
- Change the General Access permissions to Viewer.
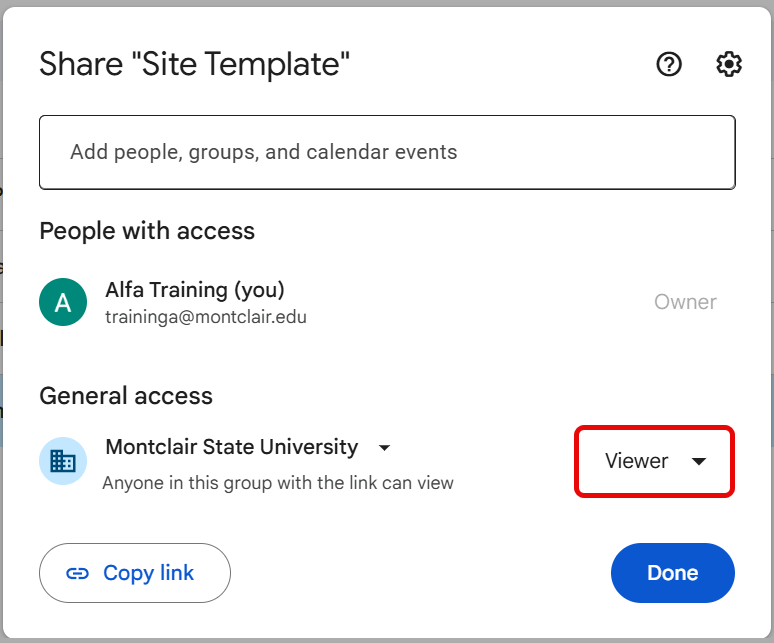
- Open the new folder (ex. Site Template).
- To create the site template file in the Site Template folder, click +New → More → Google Sites.
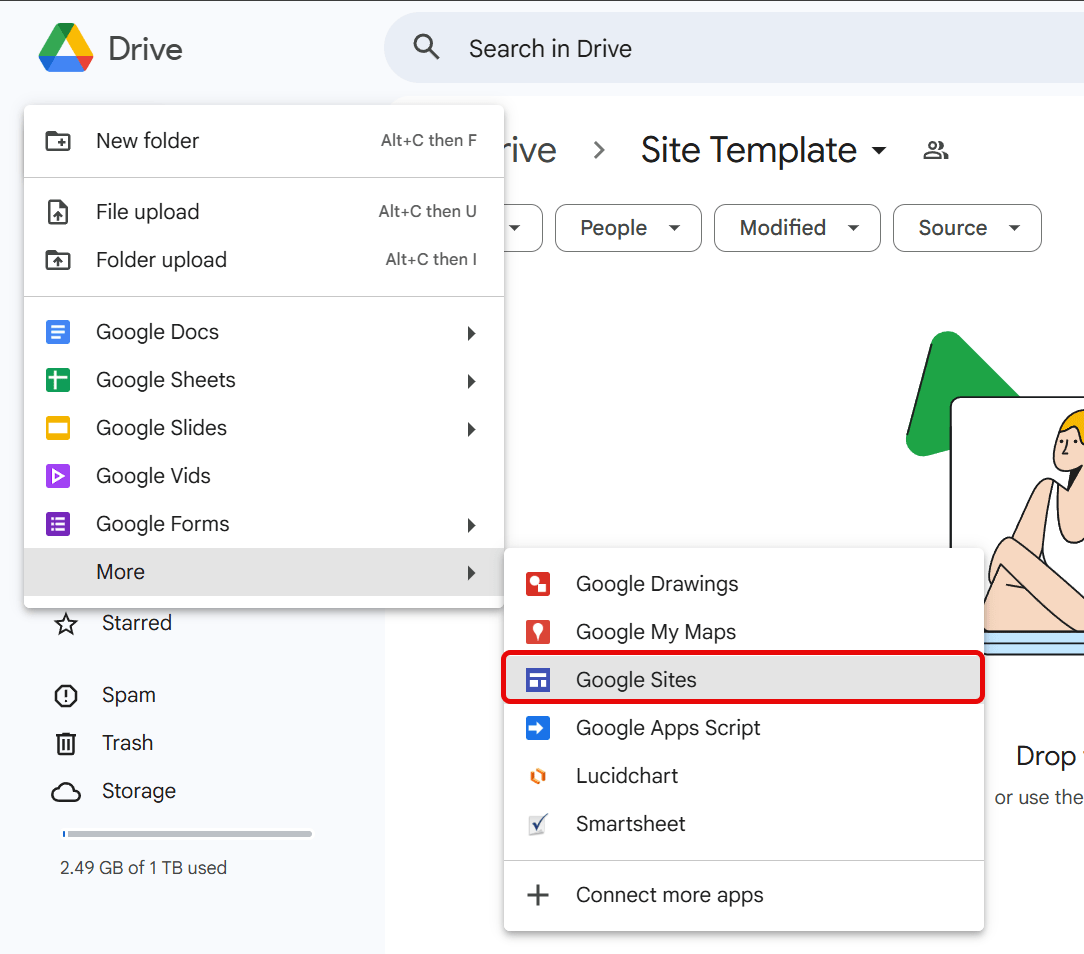
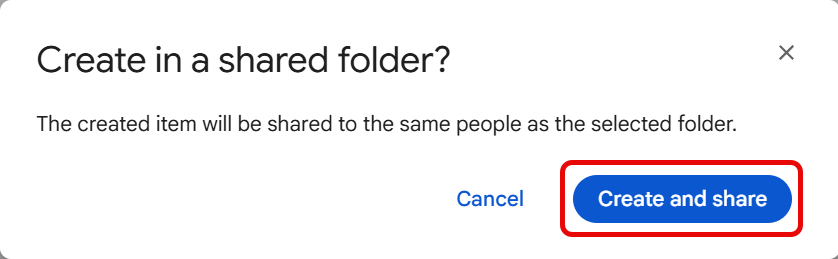
- A Create in a shared folder window will appear, click Create and share.
- A new tab will open, enter a name for the template site (ex. ITDS101 ePortfolio Site Template).
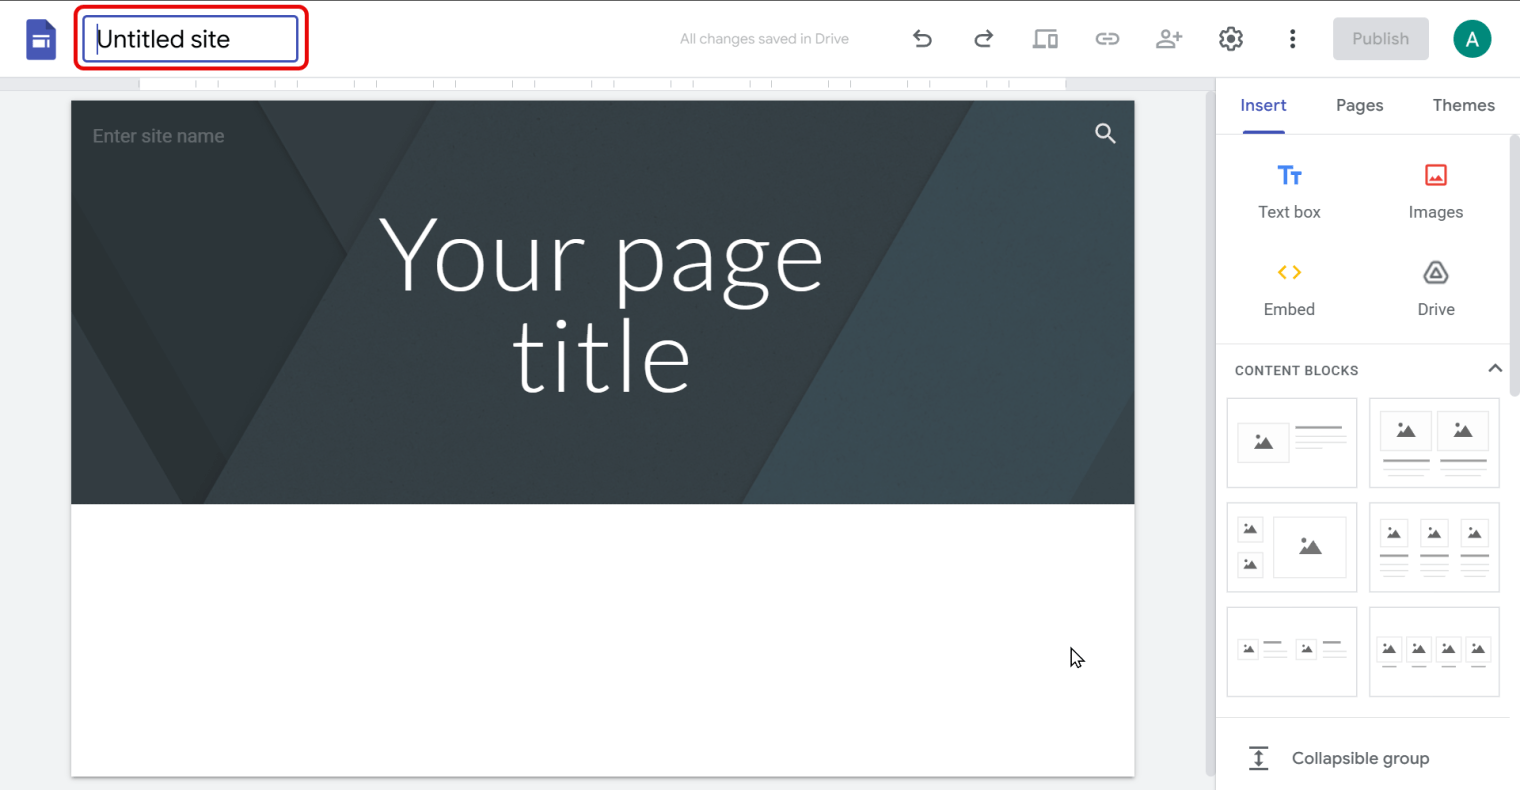
- Update the site template file with the desired layout/structure.
Note: If you have already created a template file in another location on your drive, move it to the shared Site Template folder you’ve already created.
- Once you have finished setting up the template Site, click on the file folder (ex. Site Template) in Drive then click Copy link.
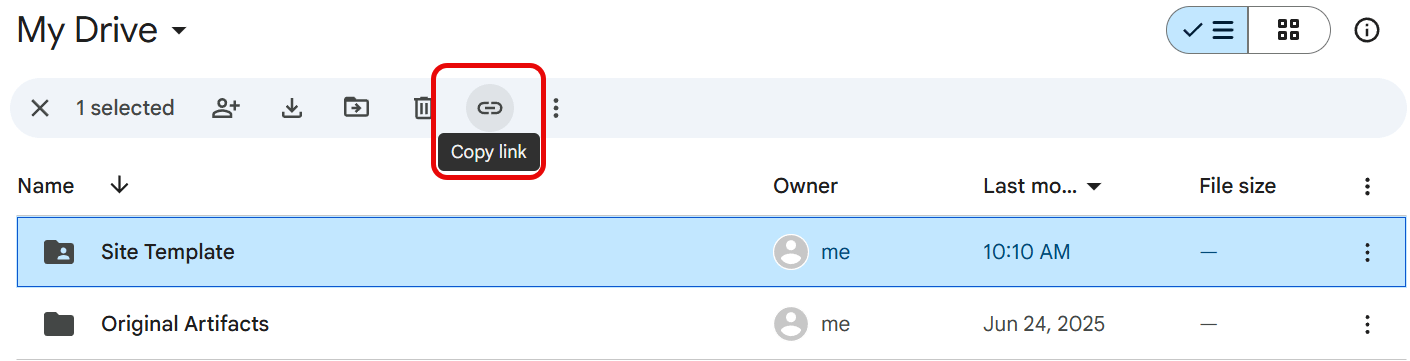
- Once you have copied the link, distribute it to your class via your desired communication method (ex. Announcement, email, document, etc.) along with instructions for making a copy of the template.